If you've ever wanted your own carvings, it's possible to follow along with a photo-trail. It can be a great way to emulate a famous carving without spending hours researching different styles. After all, you want your eyes to be as realistic as possible, and you'll likely have a lot of fun doing it. You don't have to be a carver to make a career of it. There are many ways to get realistic-looking eyes.
Lesson 4 - Carving hair
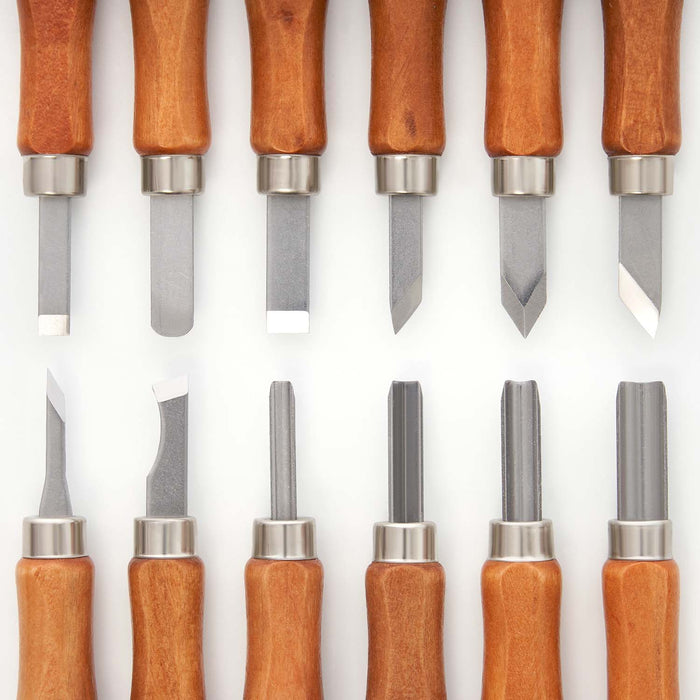
This tutorial will guide you through the steps of carving a flowing hairstyle on your animal carving. It will help you create a realistic appearance and create the illusion of lifelike emotion. It will also demonstrate the different tools you can use to make the different textures of hair. To create different levels of hair, you can also learn how to use curved tools. Once you have the basic techniques down, you can move onto more complicated parts of the face, such as the eyeballs and nose.
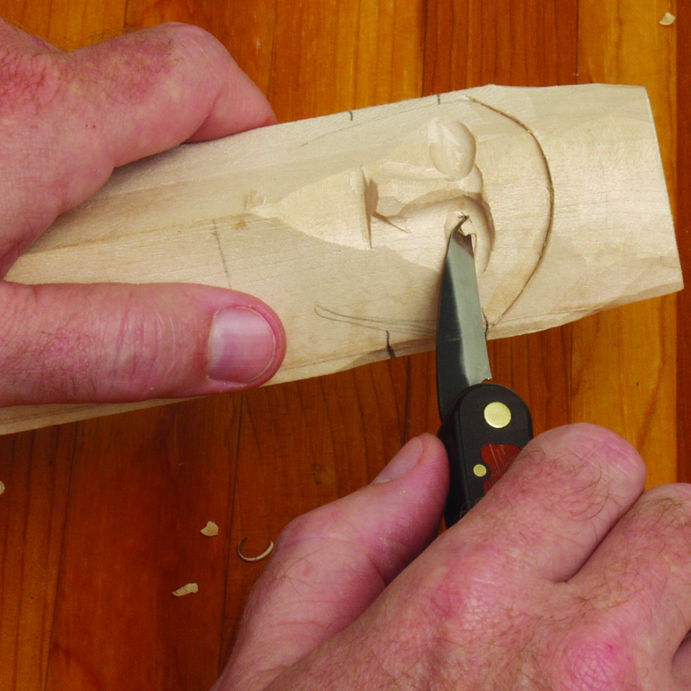
You should first outline your eye cavities using a pencil. Next, draw a straight line extending from the eyelids and eyebrows. You can also use a pencil to draw small squiggles to make the forehead higher and rounder. After that, you can use a whittling blade to round out the corners and the bottom lip.
Lesson 5 -- Carving crows' feet
Crow's feet is a common condition. You should learn what causes it. Repeated facial expressions such as squinting, can lead to wrinkles. Crow's feet can be caused by repeated facial expressions, such as squinting. You should wear reading glasses or sunglasses if you have the tendency to get them. For crow’s feet prevention, you can use facial moisturizers.
Fine lines and wrinkles on the face make people appear older than their years. These lines can be easily removed to reveal a more youthful-looking complexion. Here are some helpful tips:
Lesson 6: Carving iris
For this lesson, children can look at the iris and ocellus in a mirror to see how they appear and feel. They can also draw their own eyes using observational drawing and the mirror. They can find white or other colours in the iris, and black in the center. After the drawing is complete, they can add colour with different media and try creating the illusion of depth. Children can then look at each other's drawings of eyes and compare how they differ in colour.
FAQ
Which wooden items are very popular?
These wooden products are the most popular. They were made from sustainably harvested wood.
The most popular types of wood for furniture include oak, maple, cherry, mahogany, walnut, and teak.
These woods not only have great strength, but also beautiful patterns and colors. They also last for many years if cared for properly.
To protect wood furniture from moisture damage, it should be painted first. This applies to all surfaces, even drawers and doors.
Choose a paint with water resistance if you want furniture to last as long possible.
You should use a high-quality oil-based primer followed by two coats of top coat. Depending on the amount of wear, you may need several coats.
Avoid spray cans or aerosol colors. These products can evaporate quickly and emit harmful fumes.
What material would you recommend to start learning woodworking?
You can start with softwoods like pine or poplar. These two are the easiest to master, then you can transition to hardwood.
What's the difference?
Hobbyists are passionate about making things from wood, while professionals tend to be more focused on the quality and craftsmanship of their work. Hobbyists are proud of their creations and will often share them with family members and friends. Professionals will spend hours researching designs before they begin working on a project. Professionals will be meticulous about all aspects of their work, from selecting the right materials to finishing it.
Statistics
- Most woodworkers agree that lumber moisture needs to be under 10% for building furniture. (woodandshop.com)
- In 2014, there were just over 237,000 jobs for all woodworkers, with other wood product manufacturing employing 23 percent; wood kitchen cabinets and countertop manufacturing employing 21 percent. (theartcareerproject.com)
- Average lumber prices rose about 600 percent between April 2020 and May 2021. (familyhandyman.com)
- If your lumber isn't as dry as you would like when you purchase it (over 22% in Glen Huey's opinion…probably over 10-15% in my opinion), then it's a good idea to let it acclimate to your workshop for a couple of weeks. (woodandshop.com)
External Links
How To
How to stain wooden surfaces
Staining wood is the process of applying chemicals to the wood's exterior, which alters its color. The wood will turn from white to brownish-red due to the chemical reaction. Although oak is the most popular type of wood to stain, there are many other types that can be used.
There are many ways to stain wood surfaces. You can mix the stain with a solvent, such as turpentine, and spray it onto the wood. Others use a solution made up of water and dye, which is then applied directly onto the wood. It is possible to mix stain into varnishes and paints, making it part of the finishing coat.
Preparing your wood for staining is the first thing to do. You must clean the wood well to remove any grease or dirt that might interfere with the application of the stain. Sanding the wood smooths out rough spots and scratches. You must then decide on the type of stain that you wish to use. There are two main kinds of stains available: non-penetrating stains and penetrating. Penetrating stains penetrate deeper into the wood than non-penetrating ones, making them ideal for dark colors such as mahogany. The best non-penetrating colors are those that work with light colors like maple.
Once you have decided on the stain type that you want, get your tools ready. The best tool for applying stains is a paintbrush. It allows you to evenly distribute the liquid over the surface. You should also have some handy rags to wipe up excess stains after you finish painting. If you plan on mixing the stain yourself make sure that you have enough containers to hold the different components.
Once you have prepared your materials, start by cleaning the area where you plan to stain the wood. Use warm water and soap to clean away dirt and dust. Wipe down all furniture pieces with a dampened cloth and clean water. If you intend to stain darker wood, make sure you get rid of any debris.
The stain should be applied next. Apply the stain by brushing or spraying it onto one side of the furniture. You should work slowly and carefully. Continue moving along the grain until you reach your opposite end. The stain should not drip off of the wood's edge. Before moving on to the next steps, allow the stain drying completely.
Protect the painted surface with a coat polyurethane paint sealant. Three coats of polyurethane sealing agent are required. Let the third coat dry overnight before you sand the final coat.