
Do you have problems with the tension of your scroll saw blade? It's not uncommon. Many people have a hard time determining the proper blade tension for flower patterns on their scroll saw. The following article will address blade tension and stack cutting. It will also discuss the Workpiece foot lock and how to identify each scroll saw component. This article will explain what to do and how you can adjust the tension for flower designs.
Scroll saw flower patterns can be adjusted by adjusting the tension of your blade
Use the scroll saw with the correct blade. Adjust the tension. If these two factors are not adjusted correctly, the scroll saw will not function properly and may not cut the wood. The blade may be in any style, but the tension setting should match the design. Scroll saw manufacturers may have their own methods for setting tension. For detailed instructions, please refer to the manual. Here are some tips.
First, ensure the table is square to the blade. This can be done using a small square and a protractor. A scroll saw's scales won't be accurate. Therefore, it is necessary to periodically check them. Once you have set the blade-tension, you can cut the flower patterns. You should not tighten the blades or make them too loose.
Stack cutting
To create a scrollsaw flower shape, stack some pieces of wood together. To hold the pieces together, you can use double-sided tape. Some scrollers use small toothpicks or nails to hold their stacks together. Binding tools can also be used with staples or an old circular saw blade. This will stop the layers from shifting. After each layer has been attached, you can start cutting.
Magnification is an option to achieve more precise cuts. A magnifying glass mounted on the scroll saw or a lens for the tool is useful. A magnifying LED work lamp can also be purchased to better illuminate your work area. Some work lamps have a magnetic or clamping base, which makes it easier to move your work space. There are many styles of scrollsaws on the marketplace. Choose one that suits your needs.
Locking workpiece foot
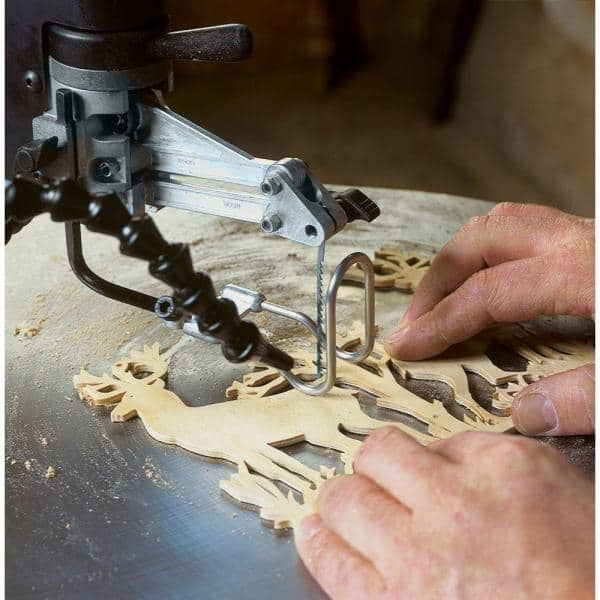
There are many choices when it comes choosing the right dropfoot for your scrollsaw. The foot must be properly placed on the workpiece. It should not drag. After making adjustments, be sure to tighten the footlock on your workpiece. Next, turn the speed adjustment knob to the desired setting. This will depend on what material you are cutting, how thick and how many of the teeth your blade has. Finally, make sure to secure the workpiece in your drop foot.
Scroll saws can't be used for all jobs. They are specialized tools made for specific tasks. The workpiece foot lock is necessary to prevent the wood from moving during the cutting of a floral pattern. This will prevent the workpiece's movement while you are cutting. It is also important to consider the weight of the workpiece you plan on using. A larger blade might be a better choice if you are planning to cut large flowers.
Identifying the parts in a scroll saw
Scroll saws are classified according to their throat size. This measure is the distance between a scroll saw's blade and its rear frame. The size of the throat determines how large the wood can be cut. The throats of smaller saws are shorter, while those of larger size have deeper throats. Before computer automation, larger objects could have been cut with industrial saws. However, for most home projects, a basic scroll saw will be sufficient.
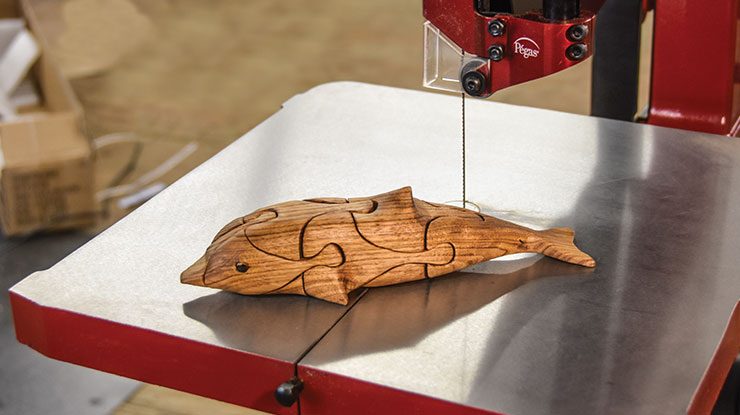
You can download a free scroll saw pattern for flower scrolls if you're not sure where to begin. These patterns include detailed instructions on how they should be built. They are very easy to follow and can make for a beautiful decoration. These scroll saws can also be used as decorative items in your kitchen or classroom. Scroll saws can be used to make useful items. It can be hard to identify the parts that make up a scrollsaw flower arrangement, but it's possible!
FAQ
How much should a hobbyist invest to get started?
A lot of capital is required to purchase the necessary supplies and tools if you want to start your own woodworking shop. Start by getting a small circular saw saw, drill press or circular saw. These items aren’t too expensive so you won’t have to break the bank.
How do I learn basic woodworking skills?
Building a bench is a great way to get started in furniture building. You can do this project using any type of wood you have on hand at home. If you are unsure what type of wood is best, you can get cheap pine boards at Lowes (or Home Depot) instead. After you've constructed your bench you'll want sand all the rough edges off and varnish it.
What's the time taken to finish a piece furniture?
It all depends on how large the furniture is. Boxes and picture frames are small projects that can be completed in one day. Larger projects, like desks or dining tables require several days. It takes time to stain and seal the wood properly.
Is it easy to start a woodworking business?
It is difficult to start your own woodworking company. There are many regulations and legal requirements that you will need to comply with. But, this doesn't mean you need to go through all of the trouble of setting up your business. Many people opt to join existing businesses instead. This will allow you to avoid paying membership fees and taxes.
What tools are best to begin with when I become a woodworker
Woodworking requires patience and practice. Learning how to use the various tools and techniques necessary for woodworking takes patience.
There are many options for woodworking equipment today. Some prefer to use power tools and others prefer hand tools.
Your choice, however, is up to you. However, you need to ensure that the tool you use is the right one for the job. Start with a basic set if you don’t have any previous experience.
You might also want to learn how a router works, which allows you to cut wood into intricate shapes. These are available at most hardware stores.
What kind of tools do carpenters use?
The most common tool used by carpenters is a hammer. A hammer can be used to drive nails into wood. It also helps them hold pieces together while they are working on a project. Other tools include clamps.
Statistics
- The U.S. Bureau of Labor Statistics (BLS) estimates that the number of jobs for woodworkers will decline by 4% between 2019 and 2029. (indeed.com)
- In 2014, there were just over 237,000 jobs for all woodworkers, with other wood product manufacturing employing 23 percent; wood kitchen cabinets and countertop manufacturing employing 21 percent. (theartcareerproject.com)
- The best-paid 10 percent make $76,000, while the lowest-paid 10 percent make $34,000. (zippia.com)
- Woodworkers on the lower end of that spectrum, the bottom 10% to be exact, make roughly $24,000 a year, while the top 10% makes $108,000. (zippia.com)
External Links
How To
How to join wood with no nails
Woodworking is a popular hobby. Woodworking is a relaxing hobby that allows you to use your hands to create useful things from wood. Sometimes you may want to join two pieces together of wood without using nails. This article will show you how to do it to make your woodwork projects look great.
Before you can join the wood pieces together, you need to remove any rough edges. Sharp corners can cause problems down the line. Now you can start gluing the boards together.
If you are working with hardwood, only one side should be glue. For softwoods like cedar and pine, glue should be applied to both sides. After applying the glue, press the boards firmly until they are completely stuck together. After applying the glue, let dry the boards before proceeding to the next stage.
After you've glued your boards, you'll want to drill holes into the joints where you plan to insert screws. Depending on the type of screw that you use, the size of these holes will vary. If you plan to use a 1/2 inch wood screw, drill a hole at least 3/4 inches in depth.
Once you've drilled your holes, you'll want to drive the screws through the joint and into the backside of the board. Avoid hitting the board's top surface. Otherwise, you could ruin the finish. Try to not hit the ends of the screws when driving the screws. This will avoid splitting in the wood's ends grain.
Now that your project is finished, you'll want to protect it from the elements. You have two options: seal the whole furniture piece or just the top. You will want to choose a product that will be durable for many years. There are many options: oil-based varnishes; polyurethane; shellac; lacquer.
These products can usually be found at any home improvement store. Just make sure that you buy the right kind for the job. Some finishes are toxic and should not ever be used indoors. Wear protective gear whenever you are handling them.