It is possible to carve wooden spoons by yourself, but it can be difficult. There are many wood types that you can carve, but some woods are much more difficult than others. So if you're a beginner, you should stick to wood that's easier to carve, such as cherry or other softer hardwoods. There are many tools that can be used to carve spoons.
Use a hatchet
It is much easier than you think to use a hatchet for carving a spoon out of wood. Finding a section that is not knotty and at least three times thicker than the spoon you are making is the first step. Most woods have a ring at the center of their growth that can fall out leaving a hole. Split the wood into sections along the middle to avoid this. The wood may be split using a fixed knife or an edged axe.
Divide a piece of wood into pieces and take out any bark or side branches. Next, mark the handles by drawing horizontal lines under the circles. These lines can be cut with a handsaw. To hold the spoon, the horizontal lines will act as a shelf. The shelf will protect the spoon from being damaged during carving. This is a great way to prevent the axe breaking off wood pieces that have not been cut.
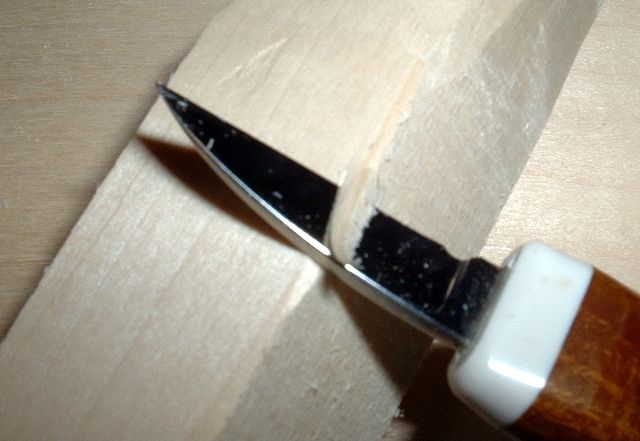
Use a knife
Split the wood into half before you can carve a wood spoon. A heavy log or branch is best for carving. Its natural curve will dictate the shape of the spoon. Also, look out for the center growth circle. This should be visible as an darker line. After you've determined the shape of your spoon you can start carving the bowl.

Using a knife to carve spoon from wood is not difficult, but requires patience and a bit of practice. You might want to use charcoal or a pencil to draw the spoon's shape. While an axe is often used to make rough cuts, a knife with a baton and a knife can be safer and much more enjoyable. You can also use a knife to split the timber with a baton.
Using a poison ivy vine
If you're looking to make a unique spoon, try using a poison ivy vine to make it. The vine will eventually die on the tree, but not before it leaves behind poison ivy oil and a nasty rash. Protect yourself from the poison ivy oil by wearing long pants, sleeves, gloves and gauntlets.
When you're carving the spoons from the wood, be sure to wear gloves and a face mask. It's not a good idea to get poison ivy oil on your hands or to put a rash on your skin. Actually, poison ivy vines are a kind of wood that looks like other woods. Bill Essex makes knives using this vine and sells them through his online shop.
Smooth finish using a knife
Some practice is needed to create smooth edges with a knife for carving wooden spoons. With fresh wood and sharp knives, it is possible to create spoons that don't have any facets or burrs in the mouth. This may require some practice but it is possible even for the most perfectionist to make a smooth spoon.
Draw the shape of your spoon after you have chosen the design. For easier carving, you will want it to be very simple. Draw a handle that is equal to the grain of the wood. Next, hollow out your bowl using a crook and/or a gouge. Once the bowl has been hollowed, begin carving the handle. Make sure to work from the south to the north.
Carving wood: Storing wood

If you're a beginner, you're probably wondering where to find wood for carving spoons. You have many options. One is to ask local lumberyards and mills where their wood comes from. You can also request power companies to remove limbs from trees. Some of the tree trimmings sent by power companies can be used to carve spoons.
You can soak your wood in water or linseed oils to keep it soft and fresh. You can also wrap your wood in plastic, and keep it in a cool place. Make sure the wood is dry before you store it. It can easily turn to rot if it isn't dried enough. To avoid this problem, you need to keep the wood in a shady, cool area and store it properly. Avoid sudden temperature changes and avoid exposing the wood to excessive moisture.
Keep your spoon razor-sharp
It is crucial to maintain a sharp edge when carving a spoon from wood. This will ensure a smooth finish. As oil and spices can be absorbed by wood, the grain of the wood should be straight. The most common woods used to carve spoons are nut and fruit trees. Cherry and walnut are prized because of their beautiful grain patterns and ease-of-carving. These trees are also a native of Arkansas and make great carving materials.
Use the right tool to cut the spoon. This will prevent you from making mistakes when carving it out of wood. Safety guidelines should always be followed when using a blade. Soft woods are susceptible to cracking so soak them in water before you carve them. They can be protected by covering them with plastic to keep the moisture in. Pre-dried hardwood is harder to carve but will not crack as easily.
FAQ
How much do hobbyists need to invest in starting a business?
To start your own woodworking company, you will likely need capital to purchase the necessary tools and other supplies. It's a good idea to buy a small tablesaw, drill press and circular saw. These items aren't very expensive, so you won't break the bank.
Where can I begin with woodworking
Learning how to build furniture is the best method. Although you will need to have tools and may make mistakes along your journey, you'll soon be able to master it.
Choose a project that interests you. You can make a simple box or a large entertainment center. Once you have settled on a specific project, it is time to find a woodworker in your area who is experienced in such work. Ask the local woodworker for help in deciding what tools and where to get them. You might even ask whether there's someone else you can talk to who does this kind of work.
How do you know which tools are the best for you?
When shopping for tools, it helps to think about your needs and preferences. Are you more comfortable with plastic or metal handles? What size screws and nails do you use most often? Are you more comfortable using power tools than hand tools?
Statistics
- In 2014, there were just over 237,000 jobs for all woodworkers, with other wood product manufacturing employing 23 percent; wood kitchen cabinets and countertop manufacturing employing 21 percent. (theartcareerproject.com)
- The U.S. Bureau of Labor Statistics (BLS) estimates that the number of jobs for woodworkers will decline by 4% between 2019 and 2029. (indeed.com)
- Woodworkers on the lower end of that spectrum, the bottom 10% to be exact, make roughly $24,000 a year, while the top 10% makes $108,000. (zippia.com)
- If your lumber isn't as dry as you would like when you purchase it (over 22% in Glen Huey's opinion…probably over 10-15% in my opinion), then it's a good idea to let it acclimate to your workshop for a couple of weeks. (woodandshop.com)
External Links
How To
How to stain wood
Staining wood refers to applying chemicals to wood's surface. This chemical reaction causes the wood to change in color. This chemical reaction causes wood to turn from whiteish to brownish. Oak is the most common wood type for staining. However, you can also use other wood types.
There are many methods to apply stain to wood surfaces. You can mix the stain with a solvent, such as turpentine, and spray it onto the wood. Some methods involve a mixture of water and dye that is applied directly to the wood. You can mix stains into varnishes or paints to make them part of your finish coat.
Preparing the surface for staining wood is the first step. The wood must be thoroughly cleaned to remove all grease and dirt. Sanding can smoothen out scratches and uneven spots. You must then decide on the type of stain that you wish to use. There are two types of stains that can be used: penetrating and non-penetrating. Penetrating colors penetrate deeper into wood than those that are non-penetrating. This makes them more suitable for darker colors, such as mahogany. Penetrating stains are best paired with lighter colors, such as maple.
After you've decided what type of stain to apply, get ready for your tools. The best tool for applying stains is a paintbrush. It allows you to evenly distribute the liquid over the surface. To remove any stains left behind after painting, you will need some rags. If you intend to mix the stain yourself you will need enough containers to hold all the components.
Once you have prepared all your materials, it is time to clean the areas where you will stain the wood. Use soap and warm water to remove dust and grime. Wipe down all furniture pieces with a dampened cloth and clean water. Make sure you eliminate any loose debris, especially if you plan to stain darker wood.
Apply the stain. Apply the stain by brushing or spraying it onto one side of the furniture. You should work slowly and carefully. Continue moving along the grain until you reach your opposite end. Make sure that the stain does not drip off the edge of the wood. Before proceeding to the next step, let the stain dry thoroughly.
A coat of clear polyurethane sealing agent is applied to protect the paint. Apply three coats with polyurethane. Let the third coat dry overnight before you sand the final coat.