
These are some tips to help you make the most of your scroll saw. These tips will assist you in using the scroll saw safely and efficiently. Securely screw the scroll saw into the workbench. The scroll saw is more susceptible to vibrations and could slide across the workbench. Also, make sure you have the blades installed correctly. Now that you have all the necessary features installed, you can begin making furniture. You are now ready to use the scroll saw.
Dust blower
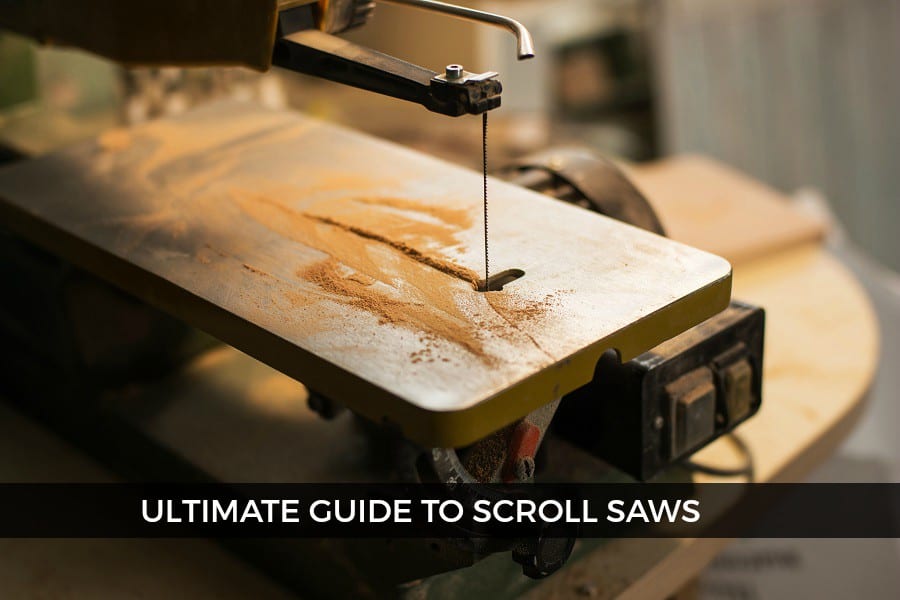
General International 21 Inch Tilting Head Scroll Saw is built with a dust blower and solid upper parallel arms. You can also hook up a dust collector to collect sawdust during your work. This saw makes detailed cuts without producing excessive noise, and features a dust blower that's easily adjustable for various air flow directions. If you already have a shop vacuum, this saw can be used as a shop vac.
Tilting table
This article will show you how to use a scroll saw and tilting table. Although many people enjoy spending hours at a scroll saw, hunching over it for long periods of time can cause discomfort, especially if your neck or shoulders are stiff. There are several ways to fix this problem and make your scrollsaw more comfortable.
Spiral blades
A straight blade is best if you need to make straight, long cuts with your scroll saw. Although it can seem tedious to switch between spiral or straight blades at times, it is easier and produces better results. Spiral blades are a good choice if you want a simple blade that can be used to cut through many materials. These blades have teeth that extend to the end of the blade.
Variable speed
Choosing the right scroll saw blade for your project is essential. Scroll saw blades come in a variety of tooth sizes and configurations to suit different materials. Typically, the higher the number, the larger the blade, which will work well for thicker materials. Smaller blades are used for thinner woods. These are just a few of the key features of the best scrollsaws blades. The best scroll saw blades will cut the thickness of the material you intend on cutting.
Transferring patterns on colored carbon papers

You may want to transfer your patterns onto colored carbon papers before you start carving. Then, place a piece of carbon papers over the desired pattern and tape the other side. Clear packaging tape can also be used. It eliminates the need for adhesive removal and sanding. After you've taped your pattern onto the paper, trace the design on the carbon paper with a ballpoint pen or dull pencil. You should not move the pattern papers during tracing or you might accidentally cut the wrong pattern.
Keep several blades handy
Consider purchasing spare blades for beginners if you use a scroll saw. There are many opportunities for making mistakes with a scroll saw. This is why it is so important to adjust your blade tension before you start. It's possible for it to crack if the tension isn’t adjusted correctly. This is why it's important to have spares. Extra blades can be purchased at your local hardware store, or online.
Use an eraser with a pencil
When figuring out how to use a scroll saw, it's a good idea to make a design in pencil and then attach it to the workpiece. Check the settings on your scroll saw and make sure the blade is properly tensioned before starting your project. Once you've marked the design in pencil, drill a 1/4-inch hole through the middle of the piece. Attach the blade to the hole by threading it through. Continue working towards the corners. Take care when you guide your blade so that there are no accidents.
The right blade
It can be confusing to pick the right type of blade when buying your first scrollsaw. There are many types of blades, so it is important to try out different models to find the right one for you. Each type of blade is unique in its design and function and is best suited for a particular job. Here are some tips to help you choose the right scroll saw blade.
FAQ
Do I need to be a genius to succeed in woodworking?
No. No. Woodworking isn't rocket science. You can create beautiful pieces of art by learning how to use simple power tools.
What furniture can I refinish?
Yes! There are plenty of ways to refinish old pieces of furniture without having to pay a pro. Here are a few suggestions:
Sandpaper can be used to remove stains and scratches. Use a clean cloth to wipe the surface.
Clear polyurethane varnish should be applied. Let dry completely before moving furniture around.
Paint furniture with acrylic paint.
Use stain instead of paint. The stain will give the furniture a rich look.
Use shellac wax. This will protect and shine the wood.
What type of wood should I choose?
The most popular types of wood used in woodworking include oak, pine, birch, maple, cherry, mahogany, teak, poplar, redwood, and bamboo. Each type of wood has unique characteristics that affect the look and feel of the final product. Oak, for example, tends be darker and more hard than other woods. Birch is soft and light, and mahogany is denseer and heavier. There are two options: solid wood and veneers. Veneers are thin sheets of wood that are glued together to form a single layer.
Do you know anything more about woodworking?
It is easy to underestimate the amount work involved with furniture construction. Finding the right wood for the project is the hardest part. It is difficult to choose between the various types of wood.
A problem is that wood doesn't have the same properties. Some woods will warp over time, others will split or crack. You must take these things into consideration before purchasing wood.
Do you have any tips on starting a woodworking business?
Starting a woodworking business is a lot of work. It's worth it if you're passionate and willing to work hard. You will probably love the challenge of starting your own business.
Remember that you may encounter unexpected problems when starting a new venture. Unexpectedly, money might run out. Or maybe you'll find that customers aren't willing to pay as much as you'd hoped. To survive, you'll need to be prepared for such situations.
One good tip is to set up a separate bank account specifically for your business. This will ensure that you always know how much money has come in.
What material would you recommend to start learning woodworking?
Start with softwoods such as pine and poplar. Once you feel comfortable with these two, move on to hardwood.
What is the minimum amount I will need to start?
Since every project differs, it is impossible to give exact numbers. These are the factors that will give you an idea of how much you'll need.
-
Material costs
-
Tools and equipment
-
Time spent working on this project
-
Hourly rate
-
What profit are you expecting to earn?
-
It doesn't matter if your goal is to hire help
You might start small if you are just starting out. As you gain experience, you'll be able to tackle more complex projects.
Statistics
- The best-paid 10 percent make $76,000, while the lowest-paid 10 percent make $34,000. (zippia.com)
- Woodworkers on the lower end of that spectrum, the bottom 10% to be exact, make roughly $24,000 a year, while the top 10% makes $108,000. (zippia.com)
- If your lumber isn't as dry as you would like when you purchase it (over 22% in Glen Huey's opinion…probably over 10-15% in my opinion), then it's a good idea to let it acclimate to your workshop for a couple of weeks. (woodandshop.com)
- In 2014, there were just over 237,000 jobs for all woodworkers, with other wood product manufacturing employing 23 percent; wood kitchen cabinets and countertop manufacturing employing 21 percent. (theartcareerproject.com)
External Links
How To
How can you accurately measure wood?
There are many methods for measuring wood. We use a digital caliper (a tool used to measure distances), a laser level (used to make sure your work surface is flat), and a bubble level (used to make sure your work surface is perpendicular).
A digital caliper has two jaws that open and close. The one jaw holds the object to be measured, while the other measures distance between them. The digital caliper can be used to measure small distances such as the thickness of wood.
Laser levels emit an infrared laser beam that projects a straight line across the floor. A red dot is created by the laser. If you look down on the line, it will show whether the surface appears even or not. Laser levels are best for checking the accuracy of large surfaces.
Bubble levels look similar to a compass. There is a bubble in the center of the device. The device will inform you if the surface is level if the bubble is in the center. For checking the accuracy of small areas, bubble levels are useful.