There are many methods to carve a Gnome. Before you begin carving, there are some important things to remember. You will have fun and be rewarding as well as the process of carving. It requires multiple layers and is a great way to learn how to carve a gnome. There are also several different ways to add creativity to your gnome carving. Here are three ways to carve a gnome from wood.
Freehand carving a gromme
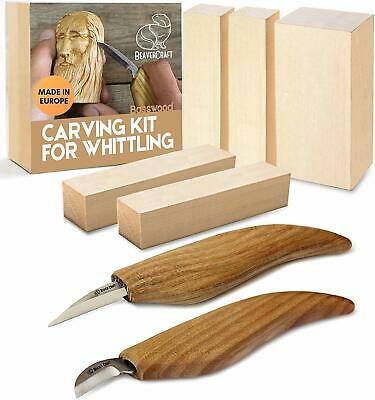
Here are some tips to help you freehand carve a Christmas gnome. You can easily carve a simple gnome using a knife. But, if you need to add detail to the hat or beard, a micro-V-tool is essential. A gnome is easy to carve and can be done in your spare hours.
You can use the gnome to practice your freehand carving skills. They were once popular garden ornaments. A gnome is a great way of assessing your skills and identifying areas for improvement. This will be a good way to measure your design, detail, depth and design. Once you have mastered the gnome drawing you can begin to sculpt his features.
Whistle carving is a great project for any woodcarver.
One of the best projects for a woodcarver to tackle is the whistle. A simple, but functional object, the whistle can be fun to carve. However, there are several important steps to follow if you want your whistle to be a functional piece. This tutorial will show you how to carve a whistle from the beginning to the end.
First, you'll need a straight-edged knife and non-toxic oil to start the project. It may seem intimidating, but carving a Gnome is an easy project that will increase your woodcarving skill and provide you with a creative outlet. It's also one of the best beginner projects, as it will provide you with an opportunity to practice many woodcarving techniques.
Creativity to Gnome Carvings
A colorful hat can add creativity to gnome carvings. A wood-carved gnome may be a whimsical decoration, or a sneering troll might make your heart melt. Gnomes add personality and charm to your garden. They can be made from wood, stone and other materials.
Make a gnome of wood
When carving a gnome out of wood, the first thing you need to do is determine the size of your wood block. You will then draw the gnome's anatomy including the head, body, feet and belt. To create smooth corners for the face, you will need to make V-cuts in particular areas. Using a chisel or knife, make V-cuts in the appropriate places. Then, using a micro V-tool, cut out a piece of wood about 1.5mm thick. This will create a nice curve for your hat rim or beard.
Remember that carving gnomes is a simple project. There is so much potential for high-quality work. Each week you can expect to see improvements in every stage of carving a Gnome. This may not be possible with every project. However, weekly carving progress will enable you to see significant improvements in design shape and facial features.
A world of gnomes can be made more gnome-friendly by adding a gnome
The Gnomes of the Underdark and other RPGs usually have one recurring character: David. This character is not insane. Telepathy, Can't argue with Elves and Fluent Animal are just a few of the traits he has. He can also be seen putting up road signs in an attempt to scare people. David and Lisa could even have a rivalry.
Gnomes are powerful casters and very skilled at using arcana. They're also the only viable race in the game. Other gnomes have the same skeleton animation, such as the undead, and the leper gnomes. Kirin Tor has had a strong presence of gnomes for a long time. Their founding member Meryl Felstorm had a gnome as an associate of his.
FAQ
What kind of tools are used to carpenters?
Carpenters use a hammer as their most common tool. The hammer is used to pound nails into wood. It also helps them hold pieces together while they are working on a project. Other tools include clamps and pliers, screwdrivers as well as measuring tape, pencils and saws.
What wooden items sell well?
These wooden products are the most popular. They were made from sustainably harvested wood.
Most furniture is made from oak, maple, mahogany or walnut.
These woods are extremely strong but also have beautiful colors and grain patterns. They will last for many years, if taken care of properly.
To prevent moisture damage, wood furniture should always first be painted. This covers all surfaces, drawers included, as well as doors and handles.
Choose a paint with water resistance if you want furniture to last as long possible.
It is recommended to use an oil-based primer, then apply two coats. Depending on the amount of wear, you may need several coats.
Spray cans or aerosol paints should be avoided. These products have solvents that evaporate quickly, leaving behind dangerous fumes.
Do I have to refinish my furniture?
Yes! Yes! There are many methods to refinish antique furniture without hiring a professional. Here are some ideas:
Use sandpaper for removing stains and scratches. After that, use a clean towel to wipe the surface.
Use clear polyurethane varnish. Before moving furniture, let dry completely.
Acrylic paint is a great way to paint furniture.
Instead of painting, use stain. Furniture will look richer with the stain.
Shellac wax is applied. This will protect and shine the wood.
Which material would you recommend for woodworking lessons?
Start off with softwood like pine and poplar. These two are the easiest to master, then you can transition to hardwood.
What kind and type of wood should i use?
There are many wood types that are used in woodworking, including oak, maple and birch. Each type of wood has its own unique characteristics that can affect the final product's appearance. Oak is a darker wood and tends to be more durable than other types. Birch is soft and lightweight, while mahogany is denser and heavier. You also have the option of solid wood or veneers. Veneers can be described as thin sheets of wood that have been glued together in one layer.
Statistics
- Average lumber prices rose about 600 percent between April 2020 and May 2021. (familyhandyman.com)
- If your lumber isn't as dry as you would like when you purchase it (over 22% in Glen Huey's opinion…probably over 10-15% in my opinion), then it's a good idea to let it acclimate to your workshop for a couple of weeks. (woodandshop.com)
- Woodworkers on the lower end of that spectrum, the bottom 10% to be exact, make roughly $24,000 a year, while the top 10% makes $108,000. (zippia.com)
- The best-paid 10 percent make $76,000, while the lowest-paid 10 percent make $34,000. (zippia.com)
External Links
How To
How to join wood without using nails
Woodworking is a popular hobby. Woodworking is a relaxing hobby that allows you to use your hands to create useful things from wood. There are times when two pieces of wood need to be joined together. This article will help you to maintain the beauty of your woodwork projects.
The first thing you'll need to do is cut off any rough edges from your pieces of wood before joining them together. Do not leave any sharp corners as they could cause problems down in the future. After you have completed this step, you are ready to glue your boards together.
If you are working with hardwood, only one side should be glue. If you are using softwoods such pine or cedar, glue should only be applied to one side. Once you have applied the glue, press down on the boards until they are fully attached. Be sure to let the glue dry before you move on to the next step.
Once you've glued your boards together you will need to drill holes in the joints to accommodate screws. You can choose the type of screw to determine the size of your holes. For example, if your screw is a 1/2-inch wooden screw, drill a hole that is at minimum 3/4 inches deep.
Once you've drilled your holes, you'll want to drive the screws through the joint and into the backside of the board. You should be careful not to touch the board's front surface. This could cause damage. Be careful not to drive the screws too hard at the ends. This will avoid splitting in the wood's ends grain.
After your project is completed, you will need to protect it from the weather. You can either seal the entire piece of furniture or cover the top. You will want to choose a product that will be durable for many years. You can choose from oil-based varnishes or polyurethane, shellac and lacquer as examples.
These products can be found in most home improvement shops. Just make sure that you buy the right kind for the job. Don't forget to keep in mind that some finishes are toxic. Protective gear should always be worn when handling these finishes.