A lidded box requires that you square the sides and perimeter of your box. Both the lid and box are made from the same 2-in thick, seasoned block. First, place a flat foot on the one side of your wood. The center of the base needs to be recessed a bit, as the final box will sit on it alone. With a small knife, cut the recess.
Problems with hollowing end grain inside lidded boxes
End grain hollowing is a common problem when making boxes. This process is complicated and requires specialist tools. An old screwdriver can be used to create a basic hollowing tool that costs $30. You can also buy a gouge to use for this purpose. The key to hollowing end grains is to not use sharp edges. A gouge should have flat, long edges and a circular fingernail shape.
End grain hollowing is five times more difficult than side grain. It can also be susceptible to tearing. This is why many experienced bowl turners experience difficulties hollowing end-grain. Although this can help to overcome the problem, you should know that special end-grain tools are often required for lidded box.
Methods to create a snap-fit lidded bag
A snap-fit lidded box is a type of container with a sliding closure. These boxes often contain liquid or other liquid-filled containers. They are easy to assemble or disassemble, and can even be automated for low assembly cost. There are many types available. Therefore, engineers should select the best snap-fits based on their cost, strength, failure rate, and other factors. This article provides an overview on the different types and uses of snap-fits.
The upper portion of a 3-D printed snap-fit lidded cardboard box should be designed with the correct measurements. The upper section should fit snugly with the base. When seated, the lid should not move. In order to ensure a proper fit, the lid must be tightened. Wood removal should be done slowly. This may seem complicated, but it's worth the effort.
Woods used for lidded boxes
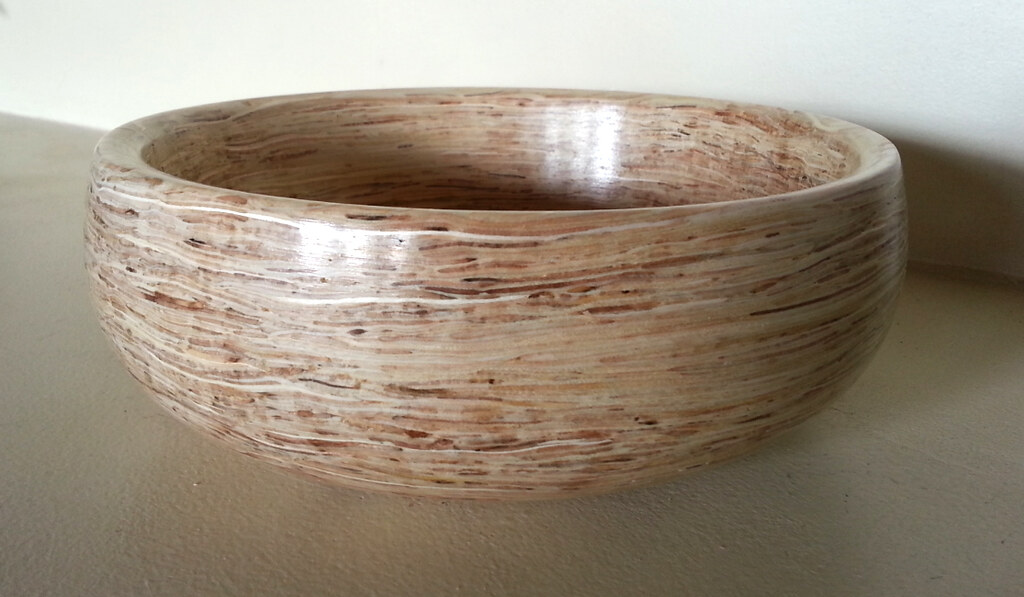
Most of the woods used for lidded box construction are salvaged from trees. After a tree has been harvested, it is dried to prevent cracks. The wood is then rough turned to create a general shape. A second drying process results in wood shrinkage. You can make a lidded container from any type of wood depending on your preference. Generally, a lid is made of two pieces - one is smaller than the other.
Small circular containers with lids were made by turning them on a lathe. Boxwood is a slow-growing wood with fine parts and a close grain. Because the grain was so close together, this wood was especially useful for creating fine features. It was commonly used to make double sided combs. Lidded boxes were also often made from boxwood, and were also known as pyxides.
The size of the lidded container
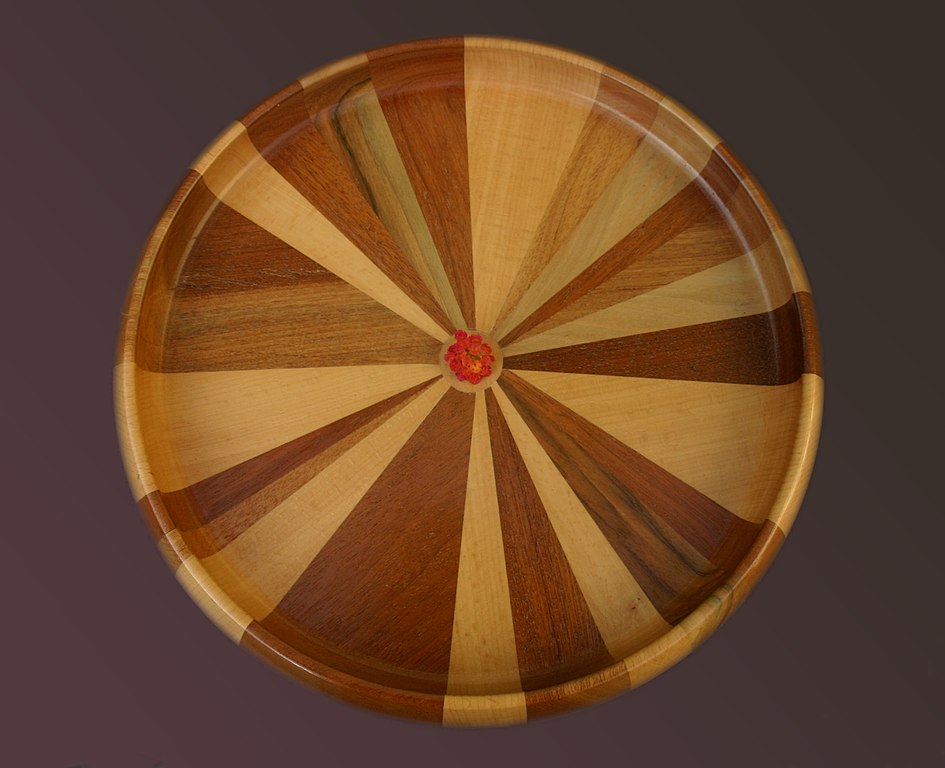
The wood type you use will affect the dimensions of your lidded boxes. Maple and cherry are most commonly used. These two types of wood have different shrinkage rates and make great boxes. For a quality box, wood should be three inches square and five or six inches long. Choose dry wood when choosing the box material. For an aesthetically pleasing lid, you can use exotic woods, but you should be familiar with the process.
First, prepare the wood. To make the bottom smooth and round, a thin file is needed. After that, cut a V-shaped cut at the joint. Once you are happy with the shape you can use a spindle roughing gouge to shape the rest of your box. Before you start carving the lid, use a parting tool to mark the bottom of the box. Next, use a skew to chamfer the base of the lid. This will soften the corner and conceal a slight circularity at the base/lid joint.
FAQ
How can a beginner woodworker make money?
Many people are beginning to learn how build furniture to launch an online business. If you are just starting to build furniture, there are many other ways to make money than selling on Etsy. Local craft fairs and events are great places to sell your products. A workshop could also be offered for people who are interested to learn how they can build their own furniture. If you have the experience to be a carpenter, builder, or a designer, you may consider offering your services in remodeling homes or creating custom pieces.
What material would you recommend to start learning woodworking?
Start with softwoods such as pine and poplar. Once you feel comfortable with these two, move on to hardwood.
How do you calculate woodworking prices?
When calculating the costs of any project, it is important to keep them as low and affordable as possible. Always ensure you are getting the best possible price for materials. It is important to take into consideration all factors that can impact the cost of your projects. These include time, skill and experience. Check out our guide on the average cost of common DIY projects to get an idea of how much you can spend on woodwork projects.
Is it hard to start my own woodworking business?
It is difficult to start your own woodworking company. There are many requirements and regulations that must be followed. This doesn't necessarily mean that you should go through all the work of setting up a company. Many people decide to join established businesses. You will only have to pay membership fees, taxes, and other charges.
Statistics
- Woodworkers on the lower end of that spectrum, the bottom 10% to be exact, make roughly $24,000 a year, while the top 10% makes $108,000. (zippia.com)
- Most woodworkers agree that lumber moisture needs to be under 10% for building furniture. (woodandshop.com)
- The U.S. Bureau of Labor Statistics (BLS) estimates that the number of jobs for woodworkers will decline by 4% between 2019 and 2029. (indeed.com)
- Overall employment of woodworkers is projected to grow 8 percent from 2020 to 2030, about as fast as the average for all occupations. (bls.gov)
External Links
How To
How to join wood with no nails
Woodworking is a favorite hobby. Woodworking can be a fun hobby because you can work with your hands to make useful objects from wood. You might want to join two pieces from the same wood, but you don't need to use nails. This article will show you how to do it to make your woodwork projects look great.
Before joining the pieces of wood together, you will need to first trim any edges. You don't want any sharp corners to cause problems later. Once you've done this, you're ready to start gluing your boards together.
If you're working with hardwood, you should only apply glue to one side. You should glue both sides if you are working with softwoods such as pine and cedar. Once you have applied the glue, press down on the boards until they are fully attached. After applying the glue, let dry the boards before proceeding to the next stage.
After you glue your boards together, drill holes at the joints where screws will be inserted. Depending on the type of screw that you use, the size of these holes will vary. For example, if you're going to use a 1/2-inch wood screw, then you should drill a hole that is at least 3/4 inches deep.
After drilling your holes, drive the screws into the board's backside. Avoid hitting the board's top surface. Otherwise, you could ruin the finish. Try to not hit the ends of the screws when driving the screws. This will avoid splitting in the wood's ends grain.
After your project is completed, you will need to protect it from the weather. You can either seal the entire piece of furniture or cover the top. Either way, you'll want to use a product that will last for years to come. There are many options: oil-based varnishes; polyurethane; shellac; lacquer.
These products can be found in most home improvement shops. It is important to ensure that you purchase the correct product for the job. Some finishes are toxic and should not ever be used indoors. Protective gear should always be worn when handling these finishes.